Hey guys! It’s been a while since I’ve posted a progress walkthrough of tutorial! Today’s focus is Overwatch’s McCree and his robotic arm, specifically the one seen in his Riverboat and Gambler skins. I made the final product for a commission that will debut at Blizzcon this year! I hope someone else can find this useful. As always, send any questions you may have and I’ll reply as soon as I can!!

This project was made using craft foam in 2mm and 5mm thickness. Some pieces were covered with worbla for extra stability. The basic idea is pretty simple, it’s just layering different shapes to achieve the end result. I’ll do my best to explain the process! In all this took about 18 hours to make. It was a lot of trial and error and testing but in the end I think the result was well worth it!
The Forearm:
Below are the two basic starting shapes for the arm brace cut from 2mm foam. The dimensions will be different based on your own arm. The top shape is the first layer and it should cover about 2/3rd of your arm from elbow crook to wrist. If you look at the reference picture above, this shape will be the light silver underlying piece of the forearm.
The lower shape the the block piece around the wrist. This should be about a third of your arm measured up from the wrist. This was cut from 5mm foam.

The next step it to cover both pieces with worbla. This is optional however I would highly recommend it since it provides a very strong and sturdy base to work with.
Covering a shape with worbla is pretty easy. The slicker, smoother, and somewhat shiny side of the worbla is the bottom. The more textured side is the top. Trace the foam onto the worbla and cut around the shape at least 1/2″ around (more for thicker foam). Place the worbla over the foam with the textured side up. Using a heatgun (or hairdryer), heat the worbla evenly. I like to start from the middle and work out, it seems to help reduce the risk of trapping air bubbles under the worbla. For simple flat shapes like this I also use a rolling pin to get them completely flat and bubble free. Finally, I use a wooden sculpting knife to press down around the edges.

After this I make small cuts along the edges. This makes it easier to fold over. Every corner should have a cut to it, and long edges can have multiple. Keep the worbla warm and fold the tabs over to the back of the piece.

While still warm, curl the piece to create a cylinder. The worbla will tend to stick to itself so you can use a little extra heat to press and weld the seam. Do this for both pieces.
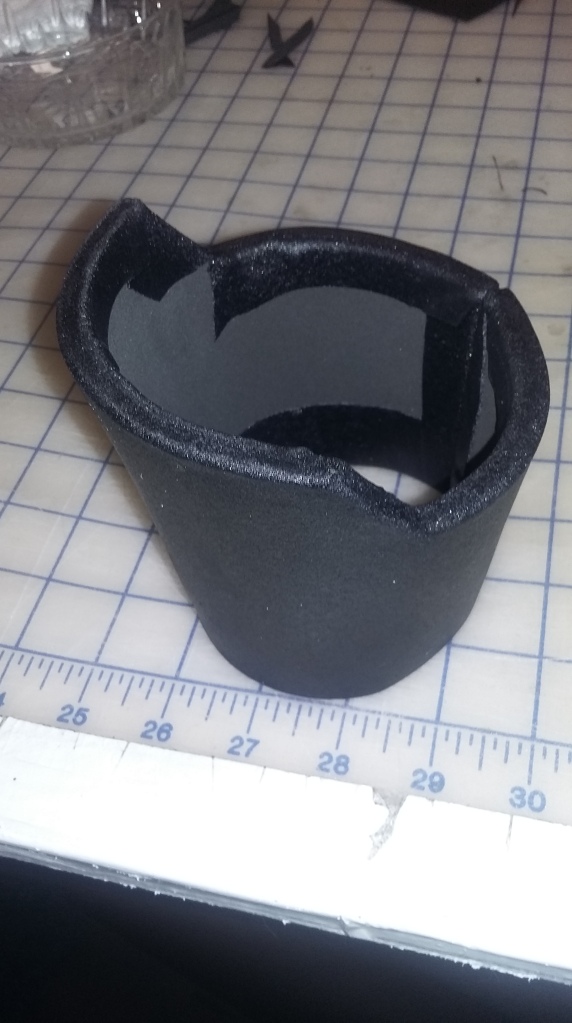
Once you have both, you can glue them together. Hot glue will work, but the heat also risks distorting the worbla. This is my first time using E6000 and it seemed to do the job pretty well!


The image below shows two more pieces cut from 5mm foam. They don’t need to have a layer of worbla. They are glued to the upper segment of the forearm. (I don’t have a picture of this stage unfortunately)

These three shapes will add height and detail to the bottom part of the forearm. All three are cut from 2mm foam.
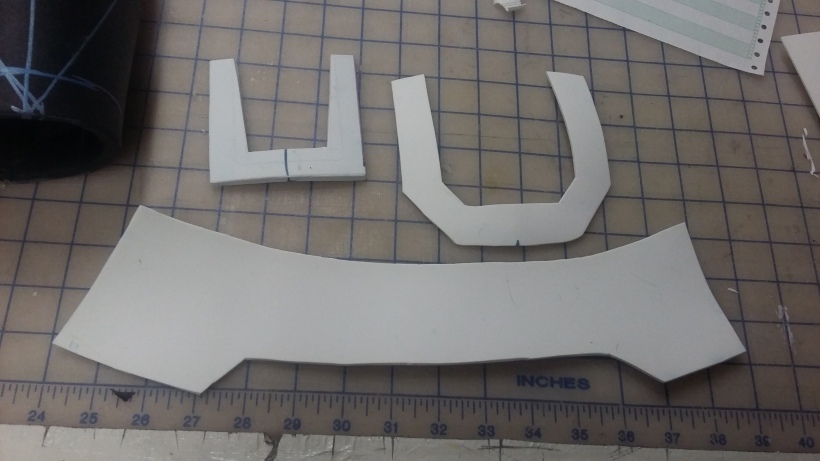
Don’t worry about all the colorful lines, these were just guides I used while trying to line stuff up. The rounder ‘U’ shape is the first to be glued down. The top edges line up with the upper edge of the lower forearm piece. (Does that make sense?). The curve extends a little past the edge of the forearm.

The long piece is the second to be glued down. Followed by the squared ‘U’ shape. The squared off shape will be the holder for the card. Don’t glue down the inner edges so you can slide a card into place there. This will hopefully make more sense with the finished product. Note to self: Take more pictures from various angles for each step!

Once all of this has been assembled, spray it all with a few coats of Filler Primer.


For those small circular parts I used two bottle caps glue together.

After it’s dry it might need a little sanding (or a lot for perfect smooth-ness). And it’s time to paint! I use acrylic paint, and paint in lots of highlights and shadows. When it’s done I spray it all with satin finish clear spray paint.


The Elbow
The next part to tackle is the elbow piece. This took a lot of experiment and trials to get right, but in the end it’s pretty easy to put together.
I used a special foam for this called Neoprene foam. It’s pretty pricey but luckily I had a friend who gave me some. This foam is a little softer than the normal craft foam. It squishes better and flexes better. Normal 5mm foam might work for this as well, but special precautions need to be taken to avoid tearing.
Here’s the base. It’s just a simple rectangle with a hole in the middle. The two half circle cut outs will meet when the edges are glued and create a second full circle. Decide if you want the seam at the top or the bottom. I opted for the top because it will be partially covered by a sleeve. The top hole (or in this stage the two half circles) was slightly larger than the bottom. When fitting it you want the hole to fit snugly around your arm while still allowing for flexing and movement.

I was worried about the foam tearing so I reinforced the back with felt. Simply coat the back of the foam with liquid cement (extra attention on the edges) and press down on a sheet of felt. Once dry, cut the felt to shape.

The raised details were added with 2mm craft foam glued down with liquid cement.

It’s easier to glue at this stage, while everything is still flat. In order to get a nice paintable but flexible surface, it was primed with sprayable Plastidip.

Next glue the edges together to create a cylinder. I used liquid cement and filled the slight gap left with caulk. The hard part here was holding the edges together while the glue dried. In my first attempt I used clips, but the foam was soft and it left ugly indentations. Instead I used tape to keep everything in place while it dried.
The cap ends were made with 5mm foam. Here’s the three pieces, and the glued down result. Make two of these and be sure that they fit the ends of the elbow cylinder perfectly.

I took a dremel to the edges to get a nice smooth curve. First time using one! Here’s the base in the front and the dremeled edge in the back for comparison.

Using the same technique as before, the two caps are covered with worbla. These are then painted and glued to the eblow cylinder ends with the e6000.

The Hand
Lastly comes the hand. It’s all built on top of a silver opera (eblow) length glove. The finger pieces are all the same basic shape, just different sizes.

This shape is cut from single thickness worbla and wrapped around the finger. Make sure to lable them as needed! The end tabs should meet, or come close to meeting, on the underside of the fingers. The thin tabs allow for finger mobility.

The hand pieces were made with rounded off squares. The plain square is for the top of the hand. The bottom shape is for the palm. The tab sticking out of it will wrap around between he thumb and forefinger.

I squared off some of the edges to give them a more mechanical feel. Also added a top and bottom hand pieces. I also added caps to the fingers. These were made with worbla wrapped around the finger tip. That was then covered with a thin layer of paperclay to smooth it all out. Everything was glued down with e6000.

Here’s what it looks like all painted.

And here’s the whole thing put together!


That about wraps it all up! Let me know if you have questions or if anything needs clarification!

Thanks so much for this! I’m working on a Riverboat McCree myself, and this guide is very helpful! It makes the task much less daunting!
That’s great! Let me know if you have any questions about the process :)
You’re so cute I could die
Thank you so much for this! Trying to figure out my next cosplay for shutocon and someone said I needed to do McCree, I’m just happy I found this in time! It means a lot!!